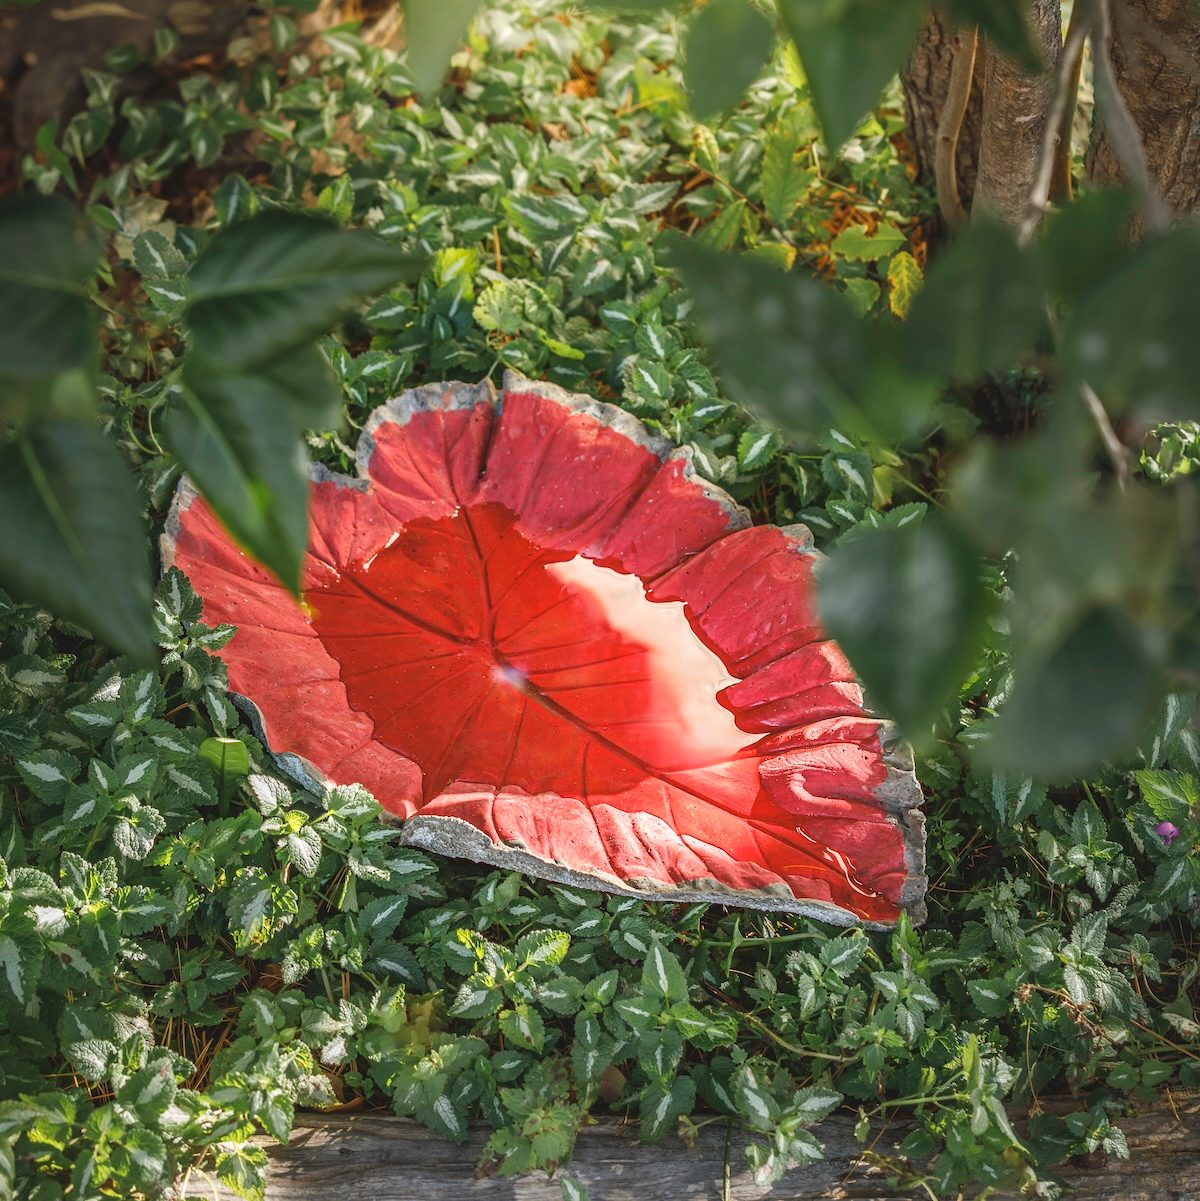
Follow easy instructions for a DIY concrete leaf birdbath to create a one-of-kind watering hole for the birds in your backyard.

Make a DIY Concrete Leaf Birdbath

DIY Concrete Leaf Birdbath Project Idea

You don’t have to pay a lot for a unique birdbath. Look for plants with large leaves in your garden. Then turn one of those big beauties into a DIY concrete birdbath. This leaf birdbath makes a serene resting place for butterflies, too. Psst—here’s how to attract birds to use a birdbath.
Tools
- Large sheet of plastic
- Mixing tray for concrete
- Paintbrush
- Rag or foam brush
- Scissors
- Trowel
Materials
- 1 medium to large leaf
- 10-lb. bag Quikrete vinyl concrete patcher
- 50-lb. bag sand
- Chicken wire
- Disposable gloves
- Nontoxic paint or concrete dye
- Nontoxic sealant like tung oil
- Vegetable oil
- Water
Step-By-Step Instructions
Step 1

Put down plastic and pour sand on top. Make a domed pile of sand so the leaf holds its shape. If needed, add a little water as well.
Pro tip: Birds prefer shallow baths, so keep the dome only 1 or 2 in. deep.
Learn how to make a DIY hummingbird mister birdbath.
Step 2

Use a large leaf, such as a rhubarb or burdock leaf. If those aren’t available, try an elephant ear or large houseplant. Place the leaf on the sand dome, veiny side up. Cut the stem at the base of the leaf. Then rub vegetable oil on the veiny side of the leaf. This will help it come off the hardened concrete smoothly.
Step 3
You can use various types of concrete and cement mixes. I had some vinyl concrete patcher left over from a driveway project. This comes as a fine powder, leaving a nice, smooth finish that captures the details in the leaf. Pour the concrete in a mixing tray and then slowly add water until it’s the consistency of brownie mix.
Step 4

Scoop concrete onto the leaf until it’s covered. The center of the leaf should be thicker (around 3/4 in.) than the edges (about 1/4 in.).
Step 5
Add chicken wire between layers of concrete for added stability. I like to cut the wire in the shape of the leaf. Once the chicken wire is in place, layer an additional 1/8-to-1/4-in. coat of concrete on top of it so it’s buried.
Step 6
Create an extended flat base on the center of the birdbath. This will act as a slight pedestal to keep the bath basin in place. Whether you leave it as is or add a flat base, allow it to dry for 48 hours. If needed, cover it with plastic to protect it while it dries.
Step 7

Take the birdbath off the sand, turn it over, then pull off the leaf. Let the concrete cure for a week before painting or adding a sealant. Avoid direct sunlight.
Step 8

Paint the birdbath with a thin wash of nontoxic paint. I used milk paint since it’s made from natural ingredients, such as milk protein, clay and natural pigments. You could also use bilge paint designed for water basins.
Start with a thin wash of paint so the intricate details of the leaf pattern show. Continue to add coats until you reach your desired hue. The paint dries quickly, so you won’t have to wait long to add more coats.
Step 9

Use a nontoxic sealant. Tung oil is sustainable and absorbs into porous materials. To use, pour a small amount directly onto the birdbath and rub it in with a rag or foam brush. Cover every nook and cranny.
Wait 30 to 60 minutes for it to dry, and then add another coat. Two to five coats should do the job.
Wait 30 days before adding water to the birdbath to allow the sealant to cure.
Next, learn how to clean a birdbath the right way, and how to repair a cracked birdbath.


